Thursday, March 30, 2017

Use NVIDIA CUDA Accleration to Rip 4K Blu-ray to H.265 for Xbox One S

If you have a new (and probably quite expensive) 4K HDR TV, then 4K video is amazing — it looks incredible. But to watch a 4K Blu-ray, you need a 4K Blu-ray player, which can set you back quite a few hundred dollars more than regular Blu-ray. If you do want to make that investment, though, the cheapest 4K Blu-ray player actually does a lot more than just play movies. You can buy a 4K-toting Xbox One S for as little as $349, a full $200 cheaper than the least expensive Blu-ray player today.


In addition, if you want to protect your expensive 4K Blu-ray disc, you can rip 4K Blu-ray to HEVC 4K video for Xbox One S playback via Plex, NAS or via USB hard disc. Since HEVC encoding is CPU heavy. You'd better get a Blu-ray Ripping tool that supports NVIDIA CUDA HEVC encoding hardware acceleration.


Pavtube ByteCopy would help you easily rip and convert 4K Blu-ray disc to 4K video so that you could play 4K Blu-ray on Xbox One S as you like.It would be your best choice to rip and convert 4K Blu-ray to Xbox One S videos. This 4K Blu-ray ripper software would rip and convert 4K Blu-ray disc to 4K MP4/MKV video without any quality loss. With it, you have no difficulty to play 4K Blu-ray disc on Xbox One S.


What's more, Pavtube ByteCopy can rip 4K Blu-ray to HEVC MKV with up to 30x times ripping speed utilizing the most advanced hardware acceleration NVIDIA CUDA & AMD APP by H.264/H.265 codec, which can give users video transcoding speed than before. >> Pavtube ByteCopy review.


 Hot Search:

H.264, MP4, MOV, AVI, MKV, FLV to H.265 | 4K H.265 to Android Phone | H.265 on my LG TV | H.265 to YouTuBe

Samsung NX1 H.265 videos to H.265 or H.264 MP4 | H.265/HEVC to WD TV HD/Live/Mini Media Player


How to Rip 4K Blu-ray to H.265 Utilizing CUDA for Xbox One S

Step 1. Load 4K Blu-ray movies


Install and launch the best 4K Blu-ray to H.265 Converter program. Insert your Blu-ray disc into your BD drive, and click “Load from disc” icon to load your 4k Blu-ray movies and DVD discs. You can also import movies files from Blu-ray folder, ISO and DVD folder and DVD ISO/IFO.


Learn: ByteCopy Joined H.265 NVIDIA to 30X Realtime 4K H.265 Encoding


load Blu-ray


Step 2: Set output format

Click “Format”, and follow “HD Video” > “H.264 HD Video (*.mp4).” as the best output video format for Xbox One S 500G/2TB/1TB. Or you can choose " Zune/Xbox 360 Device >> Xbox 360 Video - Windows Media Video(*.wmv)" as the compatible MP4 preset with best video quality. Then click “Settings” on the interface to adjust video codec to H.265. Or you can directly choose H.265 MP4.


h.265 MP4

Step 3. Utilizing Nvidia GPU Hardware Acceleration In ByteCopy


Now, move your cursor to “Tools” button on the top of the main interface to choose“Options”. Then you can enable GPU Encode acceleration. You need to check if your graphic card supports CUDA acceleration from here


Step 3: Start to convert 4k Blu-ray to XBox One S

Hit "Convert" on bottom-right corner to start conversion. When the process is over, you can find the converted files by clicking the "Open output folder".


Now, you are free to enjoy 4K Blu-ray rips on Xbox One S.


Related Articles:

FCP X Guides: Import SD/HD/4K Video to Final Cut Pro X

Final Cut Pro X uses QuickTime technology; almost any QuickTime-compatible file format can be imported and exported. This allows you to import files created in video editing, motion graphics, and photo editing applications. QuickTime compatible file formats include AIFF, MP3, MPEG, WAVE, JPEG, TIFF, etc. A QuickTime movie file uses a .mov file extension. And it is also compatible with MP4, M4V, and QT formats. And as we can see, Final Cut Pro X does not support the video formats mentioned in the title, which are AVI, WMV, RM, MKV, and MPG. Then how to edit those videos in Final Cut Pro X? We could use Pavtube iMedia Converter for Mac to convert the files to compatible formats. Whether you’re new to Final Cut Pro X or just looking to pick up some tips, you can get up to speed quickly by viewing this tutorials. Here are all of handy tips/tricks/FAQ to turbocharge your FCP X entertainment experience.


Final Cut Pro X media formats and workflow:


Best Editing Formats for Final Cut Pro X

Ingest and Import AVCHD to Final Cut Pro

Import footages/videos/projects into Final Cut Pro X

FCP X: Native vs. Optimize vs. Proxy Media

As more and more video camera manufacturers abandon tape-based conventional recording, smaller, more powerful video cameras have evolved, recording increasingly vast amounts of data. With FCP X, Apple shifts its flagship video editor’s emphasis to tapeless, metadata-based shooting and production techniques that accommodate this emerging data-centric workflow. People use digital recording devices to take notes and dictate letters, memos,videos and other correspondence to assistants for transcribing. The development of digital recording recorders has been significantly influenced by the previous generations of dictating equipment from IBM, Dictaphone and other manufacturers. But today’s electronic digital recorders have moved far beyond mere dictation into the world of high-quality recording. When you start to edit your recording files on FCPX,However, there are still some incompatible formats that cannot be imported to FCPX, such like some 4K videos or high definition XAVC videos, etc. So here're some guides for importing camera files into FCPX.


2K/4K Camera Footage to FCP (X/7/6) Solutions


Canon 5D Mark IV 4K MOV to FCP X

Canon XC10 XF-AVC MXF to FCP X

Canon C300 MXF to FCP X

Sony PMW-F55/F5 XAVC files to FCPro X

Sony PXW-X70 XAVC (.mxf) files to FCP X

Sony PXW-Z100 XAVC Videos Compatible with FCP X 

Sony NEX-VG900 AVCHD files to FCP X 

Sony FDR-AXP33 XAVC S MP4 to ProRes MOV for FCP X

Panasonic HC-VX870 AVCHD MTS to FCP X

DJI Mavic Pro 4K video to FCP X

Blackmagic Production Camera 4K Videos to FCP X/7/6


SD/HD Camera Footage to FCP (X/7/6) Solutions


Canon 100D 1080p MOV to FCP X | Canon XF305 MXF to FCP X

Canon XA20 MTS/MP4 to FCP | Canon Rebel t3i (EOS 600D) Footages to FCP X

Canon 6D Footages to FCP X | Canon EOS 700D/Rebel T5i footages to FCP X

Sony PMW-400 XAVC to FCP X | Sony Alpha NEX Cameras MTS to FCP X

Sony HDR CX170 Footages to FCP X | Sony XDCAM camcorder Footages to FCP X

Nikon D7000 MOV Recordings to FCP | Humax recording 1080p videos to FCP

Panasonic TM900 MTS Videos to FCP X | Panasonic MXF Footages to FCPX

Canon/Nikon/Sony/Panasonic/Pentax/Olympus/Fujifilm SLR camera video to FCP X 


If you happen to own some incompatible file formats such as VOB, FLV, MKV, H.265/HEVC, OGG, VC-1/WMV, VP8, VP9, MVC, Real Video, MPEG-1, MPEG-2, etc, you can easily load them into FCP X with the best editing workflow by Pavtube iMedia Converter for Mac , which can professionally generate FCP X best in different file types according to your own needs. Here're some information for you to convert these unsupported formats well.


Videos to FCP (X/7/6) Solutions


Edit 4K Video in FCP X | Edit HD Videos in FCP 7 | Edit H.264 in FCP | Edit H.265/HEVC in FCP X

Edit TS Video in FCP X | Edit M2T video in FCP X | Edit DVD in FCP | Edit VOB Files in Final Cut Pro (X/7/6)

| Edit MP4 in FCP X | Edit MOV in FCP X | Edit AVI in FCP X | Edit MPG in Final Cut Pro X | Edit Youtube Videos in FCP X

Edit ISO image in FCP X | Edit Blu-ray in FCP | Edit MKV in Final Cut ProX | Edit FLV in Final Cut Pro (X/7/6)


The FCPX supported export the following formats as Apple ProRes (all versions),AVC-Intra Class 50/100/200.,DV (including DVCAM, DVCPRO, and DVCPRO50),DVCPRO HD,H.264.,HDV,MPEG IMX (D-10),Uncompressed 10-bit 4:2:2,etc. But when the output format doesn't support you freely play that cause you have to convert the output files to meet the demand. There are some information beside here.


Export FCP footage Solutions


Export FCP to HD Video | Post FCP Project on YouTube/Vimeo

Export FCP to MP4 | Export FCP to Avid | Burn FCP projects to DVD


Other FCP (X/7/6) Tips


The Correct Way to Ingest and Import AVCHD to Final Cut Pro 7

Import and edit HD videos in Final Cut Pro smoothly


The Final Cut Pro X should now be available for download, If you crash into these troble using FCPX that you can try the best tool(Pavtube iMedia Converter for Mac ) to convert your files before editting or sharing. there are many advantages trying use our software.


100% Shop Securely
We value your privacy and protect your financial/personal info with advanced encryption and advanced fraud protection.


Support Service
Knowledgeable representatives available to assist you through instant live chat and email response within 24 hours.


Money-back Guarantee
All of our products come with a 30 Day Money Back Guarantee.


Lifetime Free Update
Regular updates provided for registered users without extra charge for lifetime.


Trusted by Millions
We currently serve more than 30,000,000 customers.


Contact us:

support@pavtube.com
macsupport@pavtube.com

Community:

Facebook

Twitter

Google+


Sunday, March 26, 2017

Uploading Canon EOS C700 4K ProRes to Instagram/Youtube/Vimeo 

Though some websites support 4K video uploading, uploading Canon EOS C700 4K ProRes to Instagram/Youtube/Vimeo is not that easy. After countless failure, you may wonder, why on earth can't my Canon EOS C700 4K ProRes videos be uploaded to Canon EOS C700 4K ProRes to Instagram/Youtube/Vimeo? 

To begin with, you need to figure out what 4K Instagram/Youtube/Vimeo video settings are. In fact, there are three basic factors that will decide whether your uploading is going to be successful or not: video file formats, size, and frame rate. Instagram/Youtube/Vimeo now accepts some video formats to be uploaded, including MOV, MP4, AVI, WMV, FLV, 3GP, MPEGPS and WebM etc but no ProRes. And videos should not be longer than Instagram/Youtube/Vimeo specified minutes. 

Now most 4K videos are Canon EOS C700 4K ProRes videos which are not supported by Instagram/Youtube/Vimeo, therefore, if you want to upload it to Instagram/Youtube/Vimeo, firstly you need to convert it to supported formats. In the following parts, I am going to introduce to you how to carry out the converting exactly with the best 4K ProRes video converter - Pavtube Video Converter

Main Features of Pavtube Video Converter: 

Convert Canon EOS C700 4K ProRes to Instagram/Youtube/Vimeo best format/codec like H.264 MP4. 
Convert Canon EOS C700 4K ProRes to any popular format including MP4, AVI, MKV, H.265, MOV, WMV, MPEG-2 etc. 
Convert Canon EOS C700 4K ProRes to editor format like DaVinci Resolve, FCP, FCE, Premiere Pro, Avid Media Composer, Windows Movie Maker, Sony Vegas Pro etc. Downsacle 4K ProRes to 1080p ProResfor more usages. 
Basic Canon EOS C700 4K ProRes video editing functions: split, merge, trim, crop, add watermark, adjust video effect, edit audio and insert subtitles. 
Perfectly compatible with Windows 10, Windows 8.1, Windows 8, Windows 7, Windows XP. 


Mac version - Pavtube Video Converter for Mac 
How to Convert Canon EOS C700 4K ProRes to Instagram/Youtube/Vimeo format? 

Step 1. Download, install and launch Aiseesoft Total Video Converter on your computer. On the main interface of the program, click Add File on the toolbar above, and load the source video to it. (If your video is in your camcorder or external storage card, transfer it to your computer first.) 


Step 2. Click the drop-down list of Format, choose .mp4 from Common Video for YouTube, Instagram and Vimeo. 


Tip. If the video size is too large, click Settings besides Profile. Set the Parameters to adjust the video size. You could also choose options on the toolbar, give your video some editing as you like. 


Step 3. Tap the “Convert” button to start the Canon EOS C700 4K ProRes to Instagram/Youtube/Vimeo conversion. 

Free download the best Canon EOS C700 4K ProRes converter: 
  

Other Download: 
- Pavtube old official address: http://www.pavtube.com/video_converter/ 
- Cnet Download: http://download.cnet.com/Pavtube-Video-Converter/3000-2194_4-75734821.html 
- Softonic Download: http://pavtube-video-converter.en.softonic.com/ 

Read More: 
Upload Canon 5D Mark IV 4K/HD Videos to Youtube/Vimeo/Instagram 
Change 720p to 1080p or 1080p to 720p with Original Quality on Mac 
Can't Post MP4 video to Instagram? Solved! 
4 Ways to Resize Camera Videos for YouTube Facebook Uploading 
Compress DJI Phantom 4 4K videos to 1080p on Mac El Capitan 
Can Final Cut Pro X Edit DJI Phantom 4K video?

Monday, March 20, 2017

DVDFab Blu-ray Ripper vs ByteCopy vs DVDFab Blu-ray Copy

Blu-ray is very popular in the world, for its incomparable storage space, excellent output quality in audio, video and supplements. But It can’t be read directly on the computer by common DVD players or drives, It requires a Blu-ray drive. What’s more, In order to protect Blu-ray movies from being pirated or even leaked to the public before public release, film makers carry out kinds of Blu-ray protections, such as Region Code, AACS, BD+, play list obfuscation, etc. Cause the Blu-ray movies can’t play freely on computer or other portable devices. Blu-ray ripper or copy software is an effective way to be able to change or backup video files’ format for people watch on different types of devices .

In the E-market, there are many software support Blu-ray disc to copy, ripper. But as a excellent copier/ripper software should be easy to learn to use with some basic configuration like lossless quality or better, operate simple and clear, work efficiently, provides a wide array of copy , compression and customization options,etc. Here introduce three most mainstream Blu-ray copier/ripper, it’s Pavtube ByteCopy, DVDFab Blu-ray Ripper and DVDFab Blu-ray Copy.

DVDFab Blu-ray Ripper, ByteCopy and DVDFab Blu-ray Copy Overview

Pavtube ByteCopy

Pavtube ByteCopy is a powerful program with the ability of backing up Blu-ray/DVD collection to multi-track MKV without quality loss, ripping Blu-ray/DVD movies to MP4 and MOV with multiple audio streams, and converting Blu-ray/DVD from hard discs to virtually any popular video and audio format. Include export single SRT subtitle file, Ripping 2D/3D Blu-rays to 3D videos Save same 3D effect with original structure. Moreover, it has Various video editing functions to support you making your personality videos.  

Key Features:

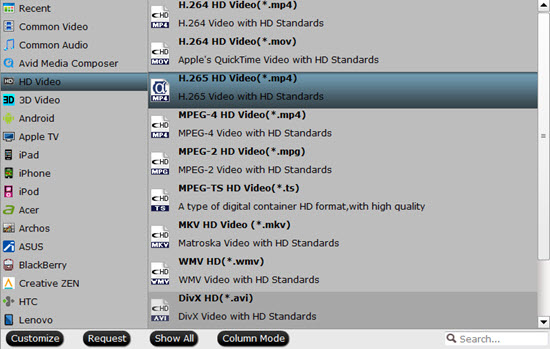
  • Copy/Rip any Blu-ray/DVD to video/audio in formats, Support Blu-ray/DVD to multi-track MKV, MP4, MOV and interlaced AVI; Lossless convert 2D Blu-ray/DVD to 3D Video;Save Blu-ray/ DVD to H.265/HEVC MP4 with better video quality.
  • Full Disc Copy with 3D Blu-ray effect; Copy the entire Blu-ray/DVD without quality loss;  Backup only main movie without extras
  • Copy/Rip Blu-ray/DVD exceptionally easy and fast with high quality
  • Export SRT Subtitles; Freely customize the output video
  • Multi-threading, multi-core, batch conversion

DVDFab Blu-ray Ripper

DVDFab Blu-ray Ripper is enhanced to be able to rip 2D/3D Blu-rays to popular 2D or 3D videos, including H.265 and 4K videos, with various format choices efficiently and effortlessly.

Key Features:

  • Rip Blu-ray to any mainstream audio formats,2D & 3D video formats
  • Freely customize the output video
  • Ensure a smooth Blu-ray ripping process and a perfect output video with quality
  • Multi-threading, multi-core, batch conversion/back up

DVDFab Blu-ray Copy

DVDFab Blu-ray Copy is a full-featured Blu-ray copier/burner/cloner powerful enough to copy any Blu-ray to any Blu-ray/DVD/AVCHD disc (with BD format, and only can be played on BD player) or to your hard drive. Also It can copy any BD 50 3D to BD 25 3D in the original format, copy 3D Blu-ray to 2D Blu-ray, and convert Blu-ray 3D to Blu-ray SBS 3D.

Key Features:

  • Copy any Blu-ray to Blu-ray/DVD/AVCHD Disc or Hard Drive
  • Lossless Clone DVD/Blu-ray
  • 5 copy modes. :Full Disc,Main Movie,Customize,Clone/Burn,Merge 
  •  Multi-threading, multi-core, batch back up

Above three of the most popular Blu-ray ripper/copier for people to use,maybe you have found the rip program seem similar to each other and contain copy function. So how to choose the best one to convert Blu-ray. Here make tests to compare the difference of the three software, through the comparison you will clearly know which one satisfied you best.

Comparison of DVDFab Blu-ray Ripper, ByteCopy ,DVDFab Blu-ray Copy


Software

DVDFab Blu-ray Ripper

Pavtubev ByteCopy

DVDFab Blu-ray Copy

INPUT

Blu-ray Discs,Blu-ray Folder,Blu-ray ISO Image File

YES

YES

YES

4K Blu-ray

/

YES

/

DVDs, DVD Folder, DVD IFO File, DVD ISO Image File

/

YES

/

Loading Time

30secs or more

8~10secs

30secs or more

4K Convert Time

1/2 to 1 Hour

1/2 Hour or Less

/

CPU Usage

60%

77%

47%

OUTPUT

3D WMV/ MP4/MKV//AVI

YES

YES

/

H.265,MP4,MKV,AVI,WMV, FLV,M2TS,VOB

YES

YES

/

M3U8

/

YES

/

MOV,DivX,XviD,M4V, F4V,SWF

/

YES

/

Lossless MKV with multi-audio tracks/chapter markers>

/

YES

/

Multi-audio track MP4/MOV/AVI

/

YES

/

Multi-audio track Apple ProRes

(Only Mac)

/

YES

/

HD Media Player

/

YES

/

Avid Media Composer (Avid DNxHD)

/

YES

/

Samsung/LG/Sony/PanasonicTV

/

YES

/

Full Disc Copy

/

YES

YES

Clone DVD/BD

/

/

YES

Blu-ray ISO image file

/

/

YES

Lossless 3D Blu-ray Copy

/

YES

/

Extract SRT Subtitle

/

YES

/

Forced Subtitle

YES

YES

/

Captures Subtitles

YES

YES

/

Extract Audio

YES

YES

/

Main Movie detection

YES

YES

YES

Main Movie Copy

/

YES

YES

 Preview

YES

YES

YES

OTHERS

Add Video Watermark

/

YES

/

Apply Special Effect

/

YES

/

Audio Fade

/

YES

/

Remove/Replace Audio in Video

/

YES

/

Trim/Crop/Add Text or Image watermark/Add Subtitle

YES

YES

/

Adjust Video Quality

YES

YES

/

Adjust Resolution

YES

YES

/

Adjust Frame Rate

YES

YES

/

Adjust Codec

YES

YES

/

Adjust Bit Rate

YES

YES

/

Flip & Rotate

YES

YES

/

Adjust Brightness/Saturation/Contrast

YES

YES

/

Deinterlacing

YES

YES

/

Split Video

YES

YES

YES

Batch Conversion

YES

YES

YES

GPU Acceleration Transcoding

YES

YES

YES

Windows

 Windows 10/8.1/8/7/Vista

Windows 2003/XP/Vista/Windows 7 / 8 / 8.1 / 10

 Windows 10/8.1/8/7/Vista

Knowledge base

YES

YES

YES

Tutorials

YES

YES

YES

FAQs

YES

YES

YES

Email

YES

YES

YES

Price

$60 A year

$42 Lifetime

$60 A year

Through the subject of Pavtube ByteCopy and DVDFab Blu-ray copy/ripper applications on ThinkPad to a battery of tests, the capability of each Blu-ray copy/ripper software is intuitively clear in the comparison chart. Following from the input, Copy/Rip, copy/conversion time, quality, usability, edit parameters to evaluate the three programs.

Input Comparison:

The above comparison chart shows Pavtube ByteCopy can input Blu-ray /DVD Discs,Blu-ray /DVD Folder,Blu-ray /DVD ISO Image File and the most popular 4K Blu-ray. There is no doubt Pavtube ByteCopy input options stronger than DVDFab Blu-ray copy/ripper.

Rip/Copy Comparison:

Both Pavtube ByteCopy and DVDFab Blu-ray ripper support convert Blu-ray into 2D/3D video formats, but Pavtube ByteCopy contains more showing on the comparison table. Such as M3U8, MKV with multi-audio tracks and chapter markers,Multi-audio track MP4/MOV/AVI,Multi-audio track Apple ProRes, Samsung/LG/Sony/PanasonicTV, etc.

Both Pavtube ByteCopy and DVDFab Blu-ray copy do full disc/ main movie copy, but Pavtube ByteCopy can’t copy Blu-ray ISO image file or clone Blu-ray/DVD. Meanwhile DVDFab Blu-ray copy can’t do Lossless 3D Blu-ray Copy or extract SRT subtitle.

Generally, Pavtube ByteCopy combine the copy outputs with convert outputs together and win again.

Copy/Conversion Time Comparison:

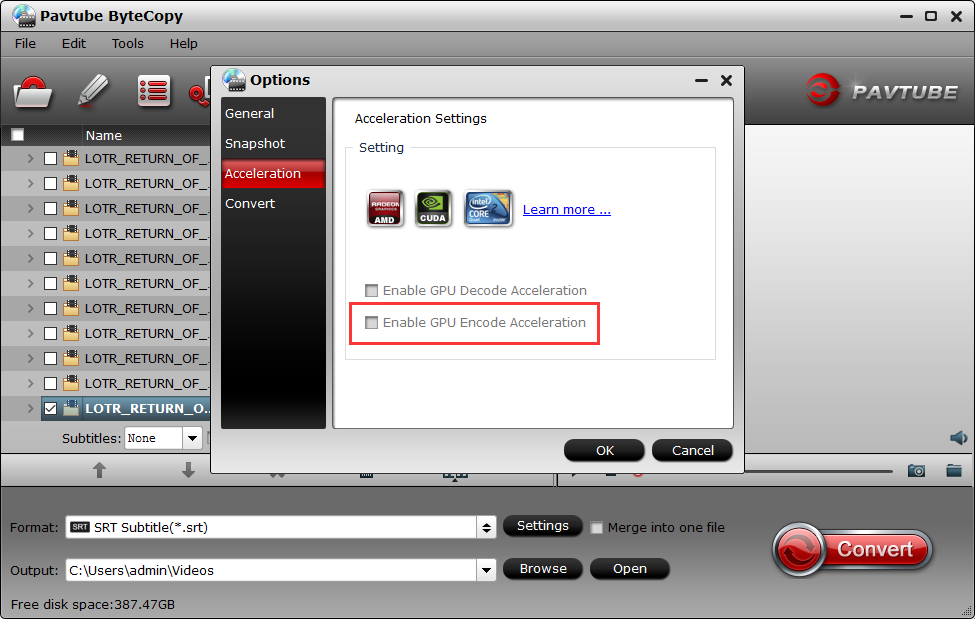
By timed how long it took each application to complete a Blu-ray main movie conversion/copy in the same condition.In general, DVDFab Blu-ray ripper takes 3hours to convert a 2.5hours 18GB Blu-ray movie on ThinkPad. And DVDFab Blu-ray copy takes 2hours to copy a 2.5hours 18GB Blu-ray movie on ThinkPad. Pavtube ByteCopy save about 0.5 hour While converting a Blu-ray in the same conditional on thinkpad , Pavtube ByteCopy converting speed was more efficiently than DVDFab Blu-ray ripper. It takes 77% of cpu usage with full use of the 4 cores and DVDFab Blu-ray ripper only 60% not fully use all cores.

Quality Comparison:

After copy/ convert Blu-ray content, we inspected the quality of both the video and audio by using NI Picture Quality Analysis (PQA) software with the NI Digital Video Analyzer to detect artifacts in digital audio and video content, And compared the copy against the original Blu-ray file. It turns out that only Pavtube ByteCopy produced lossless files with 3D effect. DVDFab Blu-ray copy/ripper had some problems such as hissing sounds, losing force subtitle.

Edit parameters Comparison:

It’s obviously to find out that Pavtube ByteCopy video edit function is more powerful than DVDFab Blu-ray copy/ripper from the comparison chart. it allows to adjust output profile parameters, editing your videos by trim,crop,Adjust rightness, saturation and contrast,Add Video Watermark, apply special effect,etc, to make your own video.

Usability Comparison:

The three programs were relatively straightforward to use, all of them have an intuitive interface that allow to convert directly, select content for conversion and access customization tools easily. But we found some particulars in DVDFab Blu-ray copy/ripper were not so humanized such as unstable for a while, Automatic Import Blu-ray disc, maybe it save some time to import Blu-ray disc,but it is hard to stop or cancel Automatic Import Blu-ray disc even found loading a wrong one. What’s more, it’s still take 30secs more than Pavtube ByteCopy to load in a same Blu-ray disc, While Pavtube ByteCopy  done this in 8secs.

Verdict

Overall speaking, Pavtube ByteCopy can do most of the DVDFab Blu-ray copy/riper, it combine the advantage of DVDFab Blu-ray copy/riper and add some other helpful function to expanding the practicability for users. Furthermore, ByteCopy compared with those marketing prices, material benefit is much. Pavtube ByteCopy software offers an easy way to make backup copies of your favorite movies and digitally archive your media library so you'll always have access to your movies, even if you lose the original discs. And it has a large library of conversion profiles for over a hundred devices, not just the ThinkPad. If you need to back up your DVD/Blu-ray discs or create 3D videos and more, you can choose the one you need.

Related articles

ByteCopy Review

Pavtube ByteCopy for Mac

Enjoy Blu-ray/DVD with multiple audio tracks & subtitle

DVDAid vs ByteCopy vs BDMagic vs Video Converter Ultimate

Pavtube ByteCopy And BDMagic Compare: Functions, Features

Wednesday, May 4, 2016

Get YouTube video Work with MX Player

Have you ever wondered if it’s possible to play YouTube videos on MX Player instead of the default app? Well, it is indeed possible. There may be pros and cons to doing it but with it, you can conveniently play your favorite videos on YouTube in the background. You can also set the video on continuous repeat. If you happen to close the video without finishing it, you can always continue from where you left off. That’s not all. You can also choose to always play the video in HD resolution. 


So if you really want to know how to play YouTube videos in MX Player, then go ahead and refer to the instructions listed below. 

How to play YouTube videos in MX Player? 

  • First, open the actual YouTube app and load the video that you want. 
  • As you load the video, click the share button in it and then select “Copy URL”. The URL of your video will look like this: https://youtu.be/Mhf20g3ky5A 
  • So after the YouTube video URL has been copied to clipboard, open your mobile browser (preferably Chrome) and then go to clipconverter.cc. 
  • Paste the URL that you copied on the given field and then convert it to MP4. 
  • Once done, COPY the download link without downloading the MP4 file to your device. All you need is the link (just right-click on the download button then select “Copy link address” from the context menu). 
  • Moving on, open your MX Player app. Press the menu icon at the top bar next to search and then select “Network stream”. 
  • On the Network Stream dialog, paste the download link URL that you copied from the previous step. Press “OK” to confirm. 
  • That’s it. The YouTube video will be streamed via your MX Player app. You can just update the player settings to set the video on repeat. You can also choose to play it in the background.
If you want to load another video, just repeat the steps above. 

Do note that you can only load one YouTube video at a time so it won’t work on playlists. 

Tips: Solution for can’t play downloaded YouTube videos on MX Player 

MX Player comes packaged with all the popular codecs and video formats you can think of for instance – 3gp, avi, divx, f4v, flv, mkv, mp4, mpeg, mov, vob, wmv, webm, xvid, and many more. But some video formats are not supported for MX Player, and some formats have complicated codecs. So in order to make you watch downloaded YouTube videos on MX Player withotut any problems, you can choose one friendly tool - iFastime Video Converter Ultimate (Mac) to help you convert the downloaded YouTube videos to MX player more friendly formats like MP4, MKV etc for your smooth playback. This powerful video converter can convert all SD/HD/2K/4K video to your desired formats, devices and programs optimized file formats, encode and decode H.265/HEVC codec, output M3U8 for streaming with local HTTP server, create 3D effect movies from both 2D or 3D resources. (read review

Hot search: YouTube to Galaxy S7/S7 EdgeYouTube to Samsung TV3D YouTube to Gear VR4K clips onto YouTubeMP4 to YouTube 


Other Download: 
3 Steps to Get YouTube video work with MX Player 

Step 1. Click "Add video" button to add your YouTube video files to the program. Or directly drag the YouTube video you want to convert to the left item bar. 


Step 2. Click "Format" bar, and select .mp4 from "Common video" or "HD video" to fit MX player. 


Tips: The default settings may not satisfy you, and you can click the "Settings" button to change the settings by yourself including video resolution, bit rate, audio sample rate, audio channel etc. for full screen playback smoothly. Or keep no changes, which is also a good choice. 

Step 3. Click the "Start conversion" button on the main interface and the software will start to convert YouTube video to MX player friendly video formats immediately. When the conversion finishes, click "Open" to find the converted video files. Then you can effortless transfer the video files to MX player for playback on with yoru devices. 

Have more questions about how to play YouTube video on MX Player, please feel free to contact us>> or leave a message at Facebook

More Topics: 

Thursday, February 25, 2016

How to Play 2D movie on Samsung 3D TV?

3D TV has been more welcomed by more and more 3D lovers. Samsung 3D TV is one popular of all 3D TVs. There are all kinds of Samsung 3D TVs like Samsung UN55JS8500 - 55-Inch 4K 120hz Ultra SUHD Smart 3D LED HDTV, Samsung UN65JS9500FXZA Curved 65-Inch 4K Ultra HD 3D Smart LED TV, etc. Generally playing 2D movies on Samsung 3D TV maybe you will feel pleased, actually you can change your 2D movies to 3D movies with 3D effect for playing on Samsung 3D TV. If you also want to do that, follow me.


Well, if can creat 3D movies for playback on Samsung 3D TV, you don’t need do to cinema usually. In order to maky you get 3D effect on Samsung 3D TV, we specially design one 2D to 3D video converter for TV - iFastime Video Converter Ultimate for Mac. With this powerful video converter, you can easily convert 2D movies to 3D movies so that you can watch the movies with 3D effect with your families at home freely. In the program, you only need directly select the output 3D formats from the 3D video profile list.

Hot search: AVCHD to Samsung TVMPEG-4 to Samsung TVVIDEO_TS on Samsung TV via Seagate NAS3D MKV to Samsung TV

You can read review to know more about the best 2D to 3D video converter. If you are a Windows use, just getiFastime Video Converter Ultimate, and the steps are same. Now first free download the top 2D to 3D video converter for Mac:


Other Download: 

How to Creat 3D movies for smooth playback on Samsung 3D TV?

Step 1. Load 2D movies

Click "Add video" button on the main interface to load your 2D MXF/XAVC/XAVC-S/MOV/AVI/MKV/MTS movies or "Load files" to load 2D DVD/Blu-ray to the program. 


Step 2. Set 3D as your output format

Click "Format" and you will find many presets. There are three types of 3D effect: Anaglyph 3D, Side-by-Side 3D and Top-Bottom 3D. Here, you are suggested to choose the presets from "3D Video" option for Samsung 3D TV. Or you can select the Samsung TV .mp4 from "TVS".


Step 3. Start conversion.

Now hit the big red "Start Conversion" to start converting videos to start converting 2D to 3D video for Samsung 3D TV. After the conversion, click "open output folder" to quick locate the generated media file and play 3D video files as you wish. Have a nice time.

Have more questions about how to change 2D movies to 3D movies for playback on Samsung 3D TV, please feel free to contact us>> or leave a message at Facebook.

More Topics:

Source:http://3dtv-sky.jimdo.com/2015/12/03/change-2d-to-3d-for-samsung-3d-tv/

Tuesday, February 16, 2016

How to watch 3D movies on Android smartphones?

3D time comes to our daily life. We like to watch 3D movies on cinema or watch 3D movies with 3D glasses via Android smartphones , etc at home anytime. But sometimes we also encounter the following problems:

“I downloaded a 3D movie, put it on my phone, loaded it in VR Cinema, and I get the split screen split again into 4 screens total. There are no options at all in VR cinema so I can't adjust anything.
Just load it normally, like in an android movie viewer?Any help?”

“Now ,I'm using iPad Pro tablet ...Its playing 3d videos but in two screens not in single,I have tried mx player, v player, bs player.....But in all player same thing happen.......... What should i do?”

“I would like to know can we play a 3d movie on phone and for that which media player should be installed in the phone or any powerful tool to watch 3D movies on phone?”

It is obvious that watching 3D movies on Android smartphones is not easy due to various reasons. So here we will share you some tips and tricks on how to watch 3D movies on Android smartphones without any problems.

How to Watch 3D movies on Android smartphones?

If you are a not iPhone user, you must be a Android smartphone user like Samsung Galaxy Note 5, Galaxy S7, Galaxy S6, Galaxy S6 Edge, Kindle Fire 7, HTC One A9, etc. There is no doubt it is a very nice enjoyment to play 3D movies on Android smartphones. But you should know 3D movies are not played well with 3D effect on Android smartphones. If you want to watch 3D movies on Android smartphones well with the 3D effect, you can buy one 3D glasses like Gear VR, VR One, Oculus Rift, Google Cardboard, or convert 3D movies to common movies or buy one 3D smartphone like LG Optimus 3D (the cost may be too high) for smooth playback. (read how to watch 3D movies with 3D glasses)

In order to make you watch 3D movies on Android smartphones, iFastime Video Converter Ultimate (Mac) is your helpful friend which not only can convert 3D movies to 2D movies, but also convert 3D movies to 3D side by side MP4/MKV/AVI etc for playing with 3D players like 3D glasses. It also can let you watch DVD, Blu-ray, MP4, AVI, H.265, Tivo, etc on Android smartphones by converting video to Android supported formats on computer.

Free download the best 3D to Android smartphone video converter for Windows:


Other Download:

How to Convert 3D movies to Android smartphones supported movies?

Step 1. Click "Add video" button to add your 3D movies to the program. Or directly drag the video you want to convert to the left item bar. 


Step 2. Select output format for Android smartphones

Click "Format" bar and find "Common Video" or "HD video". If you want to save the 3D movies with 3D effect for 3D VR headsets or 3D smartphone, here you can choose from "3D video" to select "MP4 Side-by-Side 3D Video (*.mp4)".


Step 4. Start converting 3D to Android smartphones

After you have done all the settings, return to the main interface to hit "Start conversion" button to start converting process. When the conversion is finished, click Open button to get the output videos and transfer them to Android smartphones for smooth playback. Enjoy!

Have more questions about how to watch 3D movies on Android smartphones, please feel free to contact us>> or leave a message at Facebook.

More Topics:
Source: http://imovieskit.blogspot.com/2016/01/watch-3d-movies-on-android-smartphones.html